How to get started
As any aspiring author will tell you, sometimes there is nothing more daunting than a blank sheet of paper.
The same is true of cross stitch designs, so here is a step by step guide to creating this design:
Note, over time, new features are introduced into our software regularly and some screen layouts change.
Everything discussed below is still valid, although some screen layouts will now vary.
Step 1: Open the program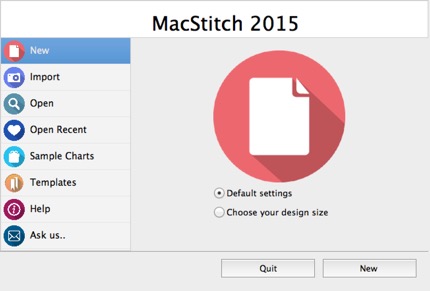
Choose ‘New’
Step 2: Know your limits. (Setting the right size)
Set the Design Area size.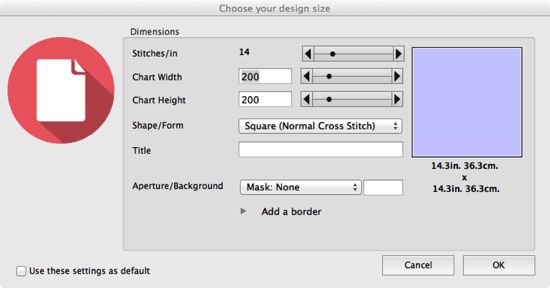
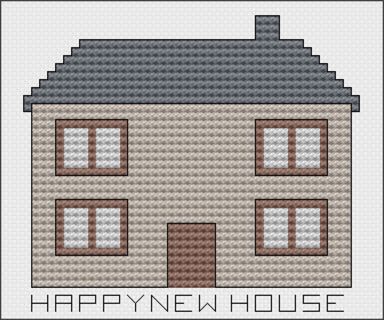
For this design, we plan to create something to fit inside a hand-made greetings card.
The space on the card is 4 inches wide, by 3 inches tall.
If you are using 14 stitches to the inch, that is 56 stitches across, and 42 down.
Enter those numbers, and you will see the sizes in the preview window change to show 4 x 3 inches.
Click OK
And there we are: a blank screen.
The grid you see can be thought of like a sheet of graphed paper.
The threads listed down the left hand side can be thought about like colored pencils.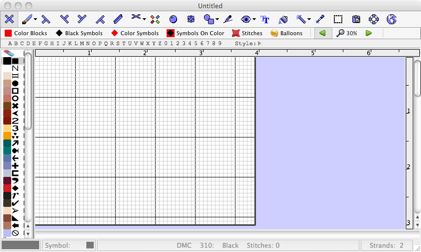
Now you can see the grid is the right size for our card.
Step 3: Choose your threads
By dragging the scrollbar across, you can see which threads are currently in the palette.
There is a useful mix of DMC shades as the default palette, but you can add extra colors by choosing ‘Add a Thread’ from the Palette menu.
If you prefer to use Anchor, you can quickly switch to Anchor Shades using the ‘Convert To...’ option in the palette menu.
For the moment, let’s just work with the flosses we have here.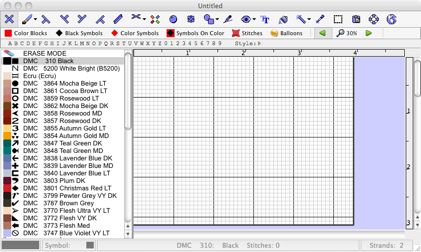
Step 4: Putting pen to paper.
Firstly: don’t worry about making a mistake.
If you do, you can always press UNDO.
(Thats CTRL-Z on the keyboard, UNDO in the edit menu, or the lifebelt icon ![]() on the toolbar)
on the toolbar)
Try that:
Click on the red thread, and use the left mouse button in the grid to draw some squiggles.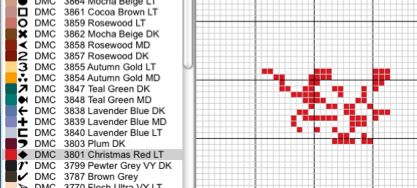
Oops: click the lifebelt, and we’re back to a clean sheet.
Step 5: Draw the front of the house
Now, to make the house, we need to select a suitable color.
Click on the Ecru color in the palette on the left.
Next, we need to draw a filled rectangle shape.
Fortunately, we don’t need to color in the whole rectangle by hand, as we would if this were REAL graph paper and pencils.
Choose ‘Solid Rectangles’ from the Shapes button on the toolbar.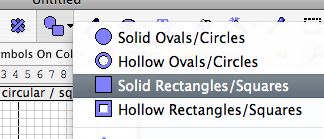
Now, using the left mouse button, click on the grid at the top left corner of the house.
Keeping the button pressed, move the mouse until it is at the bottom right.
When the rectangle is the right size, let go.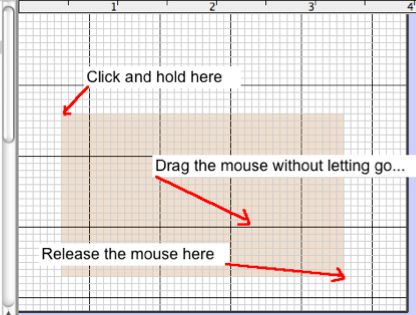
Step 6: Add the roof
The roof isn’t a nice rectangle.
We need to create a sloped area.
So we can do that by drawing lines to define the area, and ‘coloring in’ the space.
Choose a greyish color from the palette. (We’re using antique blue here)
Now, to draw straight lines, choose the Lines button ![]() on the toolbar.
on the toolbar.
Similar to drawing a rectangle, you click at one end of the line, move the mouse, and let go at the other end.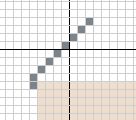
Repeat for the top and right and side of the roof.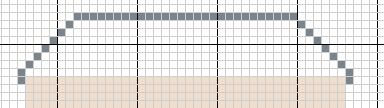
Now, to fill that with color, we can use the Flood Fill option from the toolbar.
Click the paint can ![]() icon.
icon.
Then, making sure that there are no gaps in the outline we have drawn, click inside the roof area to fill with color.
Just in case you may have clicked a blank area by accident, the application will ask: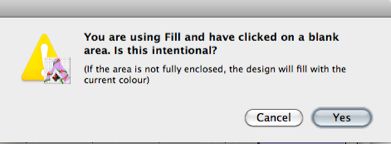
Click Yes.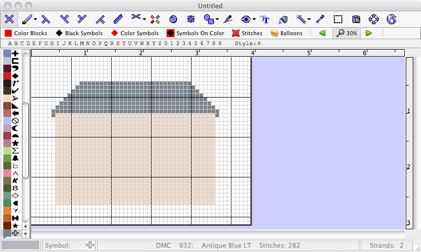
Step 6: Add door and windows, and chimney.
Using the same technique as the front of the house, the door and windows can be added simply by drawing filled rectangles.
But since all the windows are the same, draw only ONE for the moment.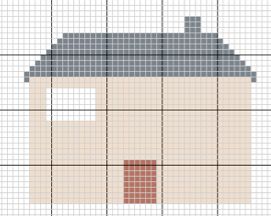
Add window frames, using the straight line tool, or draw them in by hand using single stitches.
Since we want those in the same color as the door, there is a quick way to re-select the door color.
Choose the eyedropper tool ![]() from the toolbar, then click on the door.
from the toolbar, then click on the door.
The brown color will be selected for you from the palette.
Now, choose either single stitches ![]() , or straight lines
, or straight lines ![]() , and add the window frames.
, and add the window frames.
Armed with a single window, we can COPY and PASTE the window a few times, to get the front of the house complete.
To do that, choose the SELECT ![]() tool from the toolbar.
tool from the toolbar.
Then, using the same method as you used to draw a rectangle, surround the window with the selection tool.
(You don’t need to be very precise)
When you let go, a menu will popup. Choose COPY from the menu.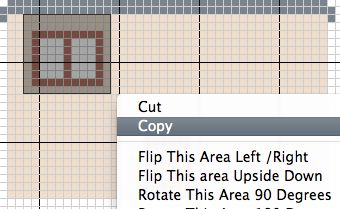
Next, you can choose the PASTE button ![]() on the toolbar (or use the CTRL-V shortcut) to begin pasting copies of the window.
on the toolbar (or use the CTRL-V shortcut) to begin pasting copies of the window.
When you do this, a copy of the window will appear under the control of the mouse.
Move the mouse around until the copy (or ‘motif’) lies in the right place.
Then click once to place it.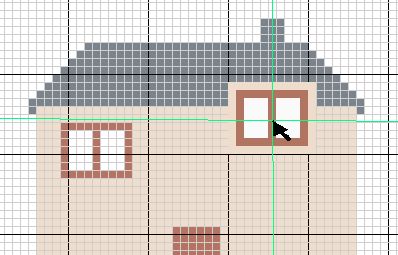
Optionally (under the preferences menu item), the pasting process will continue, so you can continue to paste new copies until you have finished.
If this option is turned on, keep pasting the remaining two windows, then click the Single Stitch icon ![]() to stop pasting.
to stop pasting.
If you do not have this option turned on, you will need to click PASTE again for the next windows.
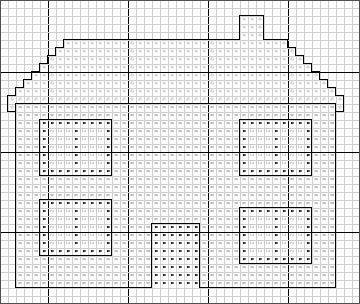
Step 6: Add some outlining
To get some definition, this is a good time to add some outlining.
Choose a black or dark thread from the palette.
Then choose ‘Automatic Outline’ from the toolbar, as shown.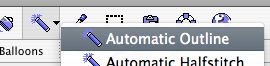
Now, like using Flood Fill previously, you can click once on the Ecru house frontage.
Select the Automatic Outline tool again, and click on the grey area of the roof.
Each time, the application will add backstitch to the outside of the color you clicked upon.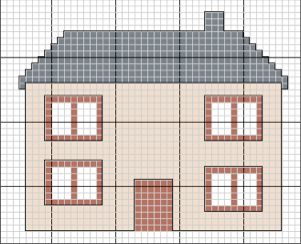
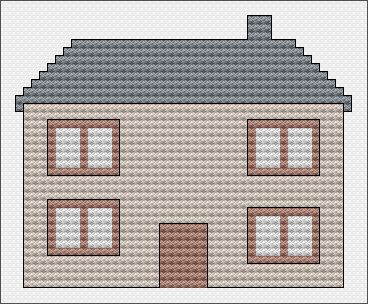
Step 7: Another view of the design
How will this look stitched?
Use the virtual stitches view on the toolbar to switch to stitched view.![]()
How will this look as a printed chart?
Use the symbols view on the toolbar to switch to symbols view.![]()
Now, in this view, things are a little small to make out properly.
We could do with zooming in a bit.
Step 7: Zooming In & changing the symbols.
To get a clearer view, let’s zoom in a bit.
Use the zoom button on the toolbar to make the grid bigger.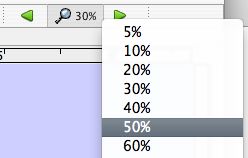
Much easier to see!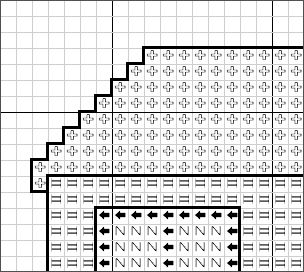
Are we happy with those symbols?
It’s usually best to set dark symbols to dark colors, and light symbols to light colors.
To do that, click on the thread in the palette,![]()
then click on the symbol button at the bottom of the screen:
And choose a new symbol for this thread: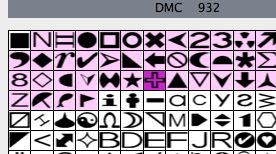
by clicking on one of the available ones. (the dark shaded one is the current one. Pale colors are used by other threads.)
Repeat for other colors that need it, and you can make the chart as clear as you like.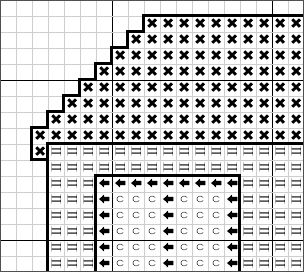
Step 7: Add the lettering
To add the lettering, you could select the backstitch tool ![]() from the toolbar and draw each line one by hand.
from the toolbar and draw each line one by hand.
Fortunately, the program contains a selection of ready-made letters.
To make use of these, first, select the size and shape from the toolbar.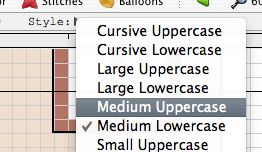
Now, click the letter H on the toolbar.![]()
The mouse will now allow you to place a letter H on the pattern, in the same way as you previously placed the windows.![]()
You dont need to keep going back to the toolbar to change letters.
Press the letter A on the keyboard, and the letter under the control of the mouse will change to an A.
Click to place it.![]()
Then press P, and place it twice, and so on.
Step 7: Oh no! A mistake!
The sharp eyed among you will have noticed that one window is slightly in the wrong place.
That was deliberate for this example, but its the kind of thing that is easy to do by accident.
We need to move it a little bit.
To do that , we use the SELECT tool, and instead of using COPY, we use CUT.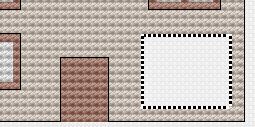
Then choose PASTE, and place it in the right spot.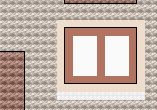
Finally, fill in the gap with some Ecru stitches.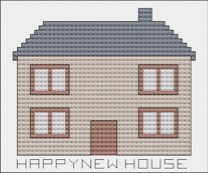
Step 8: Do you want anything with that?
And of course, that’s just something basic.
You might add grass, trees, names, birds, smoke from the chimney..
But hopefully this has given you something to start with.
Don’t forget to save!