How to create and add your own border.
Note, over time, new features are introduced into our software regularly and some screen layouts change.
Everything discussed below is still valid, although some screen layouts will now vary.
This section was prompted by the following question:
I am making up my own cross-stitch pattern that I am wanting to put a border around. Is there any way to do a section of the border and then copy and paste, copy and paste, etc., all the way around so I don't have to do the entire thing by hand? It will take quite a while to do it manually.
Adding a border to a design used to be exactly this process.
However, we added the ability to create and use borders for your charts.
There are a small number of borders supplied with the program, but these are just examples of how you can use the borders facility.
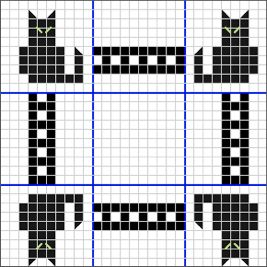
How to create the Cats Border: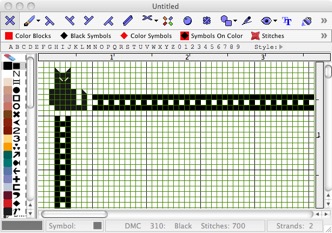
The first thing we need to be aware about is the size of the cat motif in the corner. As you can see, it fits inside a 10 x 10 area.
The repeated portion is a simple ‘ladder’ design which fills the remaining space.
So to make a border, we need
CAT, lots of small pieces of ladder, CAT
then lots of small pieces down the side, followed by
CAT, lots of small pieces of ladder, CAT
We start by choosing File/ New Border.
To keep things simple, we can set all these values to 10.
(The screen shows an example border using hearts and flowers)
Click OK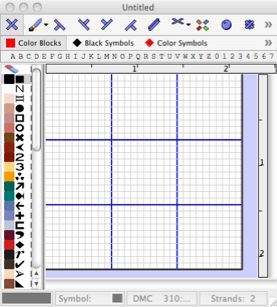
Unlike a normal chart, there are now some blue lines on screen.
These show you the areas that can be used to make the border.
(Note: The centre section would NOT normally be used for a border)
Draw or paste the cat into the top left corner.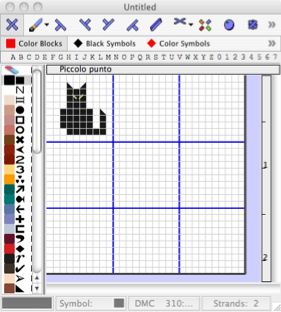
Next, we can select the cat, and use ‘Flip L/R’ to reverse the image.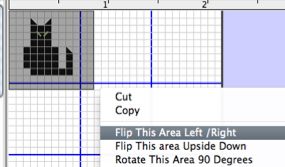
Paste the new cat in the box on the top right corner.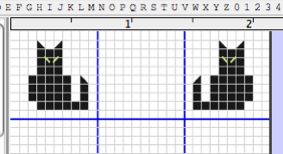
Repeat for the bottom 2 corners. You can use different images in every corner if you want.
And don’t forget that you might want to turn these images upside down, too: this is common for rug making.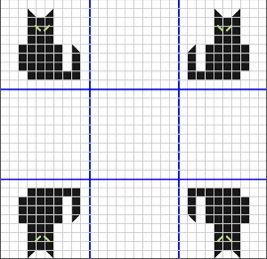
Now, lets add the ladder effect, by drawing into the middle boxes.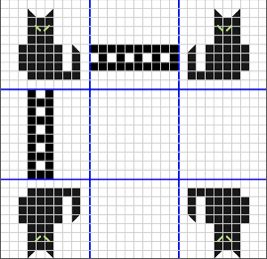
Finally, SAVE the border into the BORDERS folder, with a suitable name.
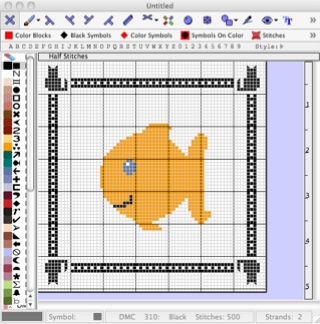
How to use the Cats Border:
Firstly, create or open a design that you want to apply a border to.
Choose EDIT / Add a Border from the menus.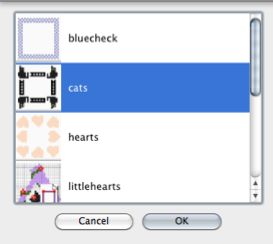
Select the CATS.BORDER file, and click OK.